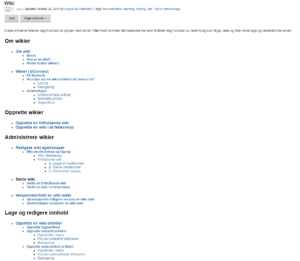
Very often, the start page of a wiki in IBM Connections tends to look like this:
This looks very dull. It’s not very inviting for the users and the need for scrolling will make it harder for the users to find what they are looking for. Yes, you can tell the users to search the wiki, but believe me, they won’t!
I’ll admit it straight away: The wiki pictured above is made by yours truly, and it was made to document how to make wikis (am I meta or what?). The feedback from the users was that while my documentation was really good, it wasn’t very inviting for them to start using it. In this day and age, people want easier access to things. They want pictures and graphics, and their cell phones have spoiled them when it comes to no need for scrolling and having big colorful buttons to push.
A few months later we introduced Skype for Business in our company. And when the time came to create a wiki on how to use Skype for Business, I decided to try and spruce up the documentation a bit more. So this is the start page for the Skype for Business wiki:
This time the feedback was much better:
- Users didn’t have to scroll
- The page looked much more inviting with graphics
- The icons and text gave a good description of what each link was about
Both the icons and the text are clickable links (I show you how to make image links in a Connections wiki further down in this posting) and we took this even a step further in our next wiki. I can’t take full credit for what I’m showing you next. It was shown to me by Erik Borse from the company Item, and I rolled with it and expanded upon it.
We created a wiki to document our internal processes. From the wiki start page (which I cannot show you), you can click on an icon for Strategy and management. This is the wiki page you arrive at if you click on that icon:
Each box is clickable, and it gives the user a quick and easy way to click on further down in the wiki structure. In addition, each box has it’s own unique color. If a user clicks on the orange box, all boxes and colors on the underlying pages will be orange. This way the user knows she is still within the same subject and page structure.
The really good part here is that there’s no need for the users to design those graphic buttons in a graphical tool You can create them in Microsoft Powerpoint.
- Start Powerpoint
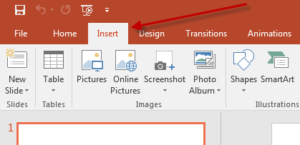
- Go to the ribbon called Insert:
- Click on Shapes:

- Choose the shape you want. The mouse pointer will now become a cross hair
- Click inside the Powerpoint document, hold the left mouse button pressed and then drag the mouse pointer to the right until you the figure has reached the desired size:

- Release the mouse button
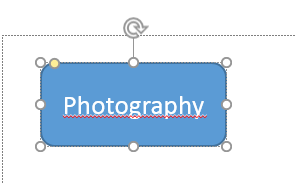
- Double click on the shape to go into editing mode. Add the text you want. If the text gets too big, you can either decrease the font size (just like you would change font size in a normal text document) or click on any of the circles surrounding the shape to resize it by pulling back or forth:
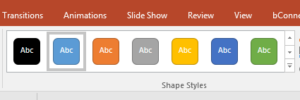
- You can change the color of the shape in the ribbon menu:
- Click on the shape and make sure it looks like this:

- Copy it (Hold down CTRL+C). If you hear an error sound from Windows, click outside the box and the inside it again to mark it. Try again
- Go to the wiki article, put it in edit mode, place the cursor in the spot where you want to paste the shape and paste it (CTRL + V):
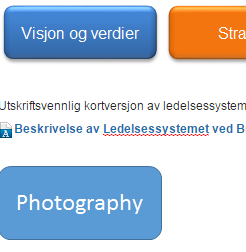
PS! Making buttons like this from Powerpoint only works in Windows, it will not work on a Mac!
What will work on both in Windows, Linux and on a Mac, however, is pasting regular images into the wiki article. And now I’ll show you how to create a link to another wiki-article, so that when a users clicks on an image, that article will load. This method works both for regular images and images created with Powerpoint:
- Open the wiki article you want to link to
- Go to the URL-field, mark the entire text and click copy it (either by right clicking on it or CTRL + C):

- Go to the wiki article you are editing and click on the image you want to create into a link, right click on it and choose Image Properties:
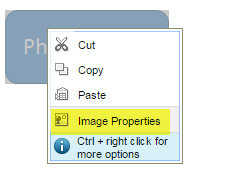
- The following screen will pop up:
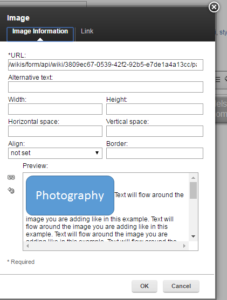
- Click on the tab called Link:
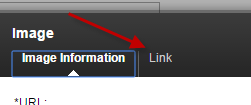
- The popup will now give you this form:
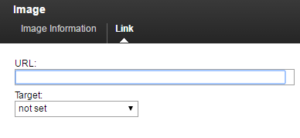
- Paste the wiki page address into the URL field. Use the Target pull down field to choose whether this link should be opened in a new window or not
- Click OK
That’s it. Now the image will contain a link that will open the wiki page you linked to. Save the wiki article and test that everything works fine (it should).
I’m not saying this is the perfect way to construct wikis, but in my experience it does make wikis look nice and easier to use. And it’s really easy to learn how to do it, without becoming an HTML expert. Of course, if you do know HTML, you can make some pretty impressive wiki designs, but I wanted to show you an easy trick which is more achievable for everyone.
Did you like this tip? Leave a comment either here or on the social media platform where you found it! And give me a follow!
